
While I was hanging out in Philly and Ed was on the boat he was cooking up a few sewing projects for us. Once I got back to the boat, and after taking a few days to get over the fact that we were still in the boatyard, we got to it!
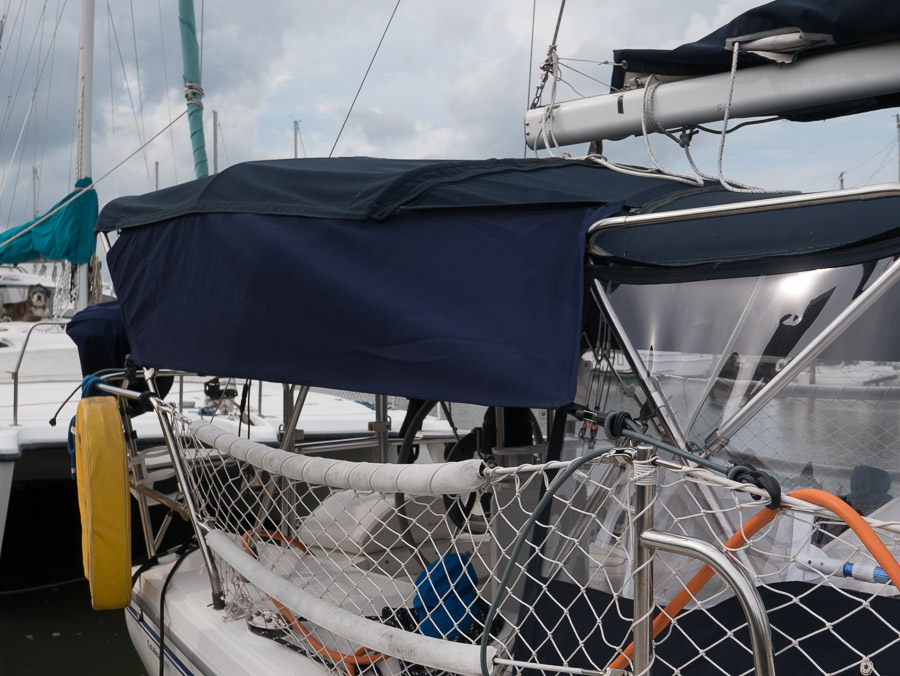
Our boat had a great bimini/dodger already. But the cockpit was still getting soaked in the rain. Unfortunately the design of the cockpit with slanted sides does not lend itself to a complete enclosure. So Ed came up with the brilliant idea to create side awnings for the bimini that we can put on or remove as needed. They would be tensioned down with the bungee cables. Hopefully they would keep the cockpit dryer and provide better protection for us when we are underway in the rain.
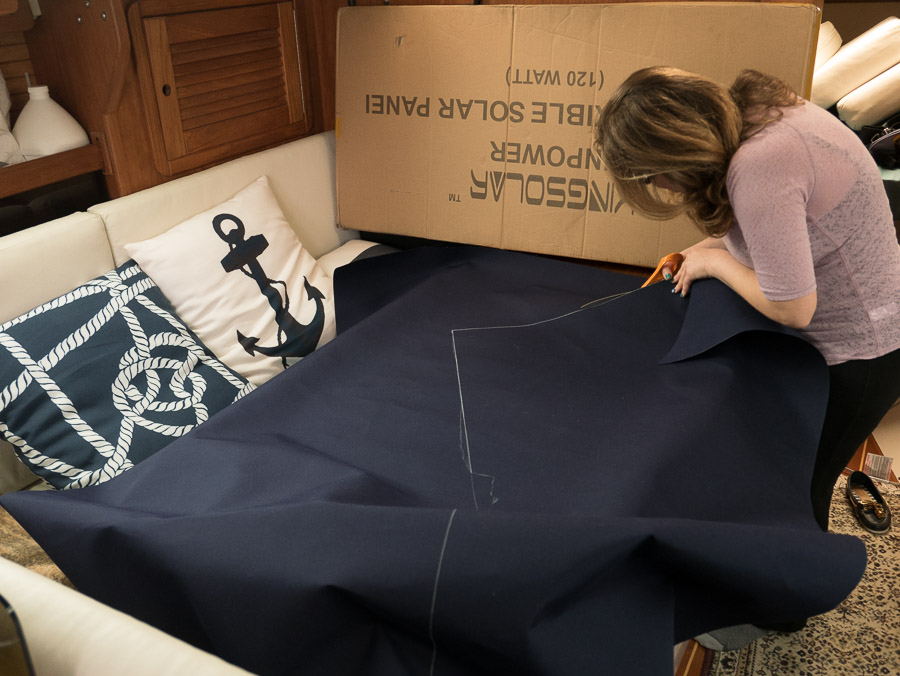
First we came up with the design and estimated the measurements. The advantage of being at the boatyard is that we had somewhere to ship all the supplies we ordered from Sailrite.

Then we got to cutting the fabric. Now on the teeny boat there isn’t much room to lay out the roll of fabric to measure out the 87 inches needed lengthwise. So we took over the floor in the boatyard office to do our measuring and cutting!

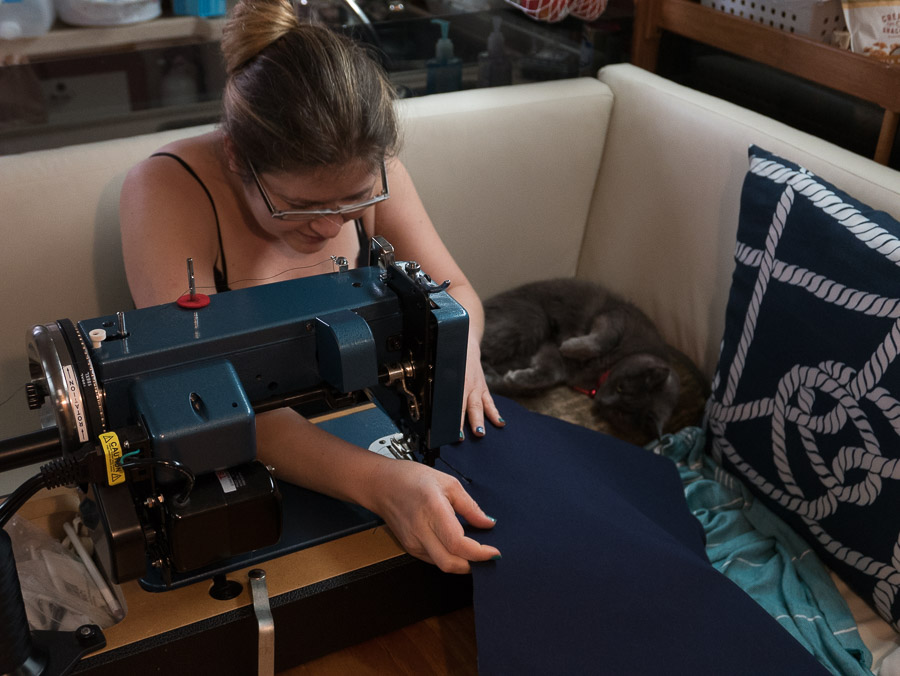
We set up our trusty Sailrite machine in the salon. That’s the great advantage of this machine and its carrying case, it’s compact and easy to set up, just needs a small surface. Once we got the material cut, I sat down to sew on the edge binding. Our machine came with the nifty binding attachment which makes sewing the binding a snap. The sunbrella material frays very easily, so it’s good to singe the edge. Typically if you do the binding, you can skip that step. We were lucky that the boatyard had a hot knife and let us borrow it for a few days, so we did both.


Once that was done, it was time for the zippers! In our design, we’d have two zippers on each side. One along the side of the bimini and one along the binimi/dodger connector. The trick though was to ensure that the material between the two zippers was very taught to help close the gaps and minimize the rain. For each side, we pinned both zippers in place. One of the zippers was too long so we trimmed it and installed a zipper end. Was easy peasy, plus the Sailrite zipper videos were a huge help! I attached the half of the zippers that go onto the bimini first. Then I started working on the sides attached to the new panel. I think I measures, pinned/repinned this five times. Finally I realized that first and foremost, I just need to sew the smaller zipper that matches with binimi/dodger connector. Once that was in place I was able to then stretch the rest of the panel along the edge of the bimini, pin where it needed to start on the side closer to the dodger and then sew it in place. Then I attached the webbing folded in half to make a loop at the forward and aft bottom edges of the panel and voile! Sure enough we got to test the awnings within a day or so of completing them.
The final product:


Supplies we used:

That looks like a great addition to your boat. Nice job. I’ve been lurking in the blog-o- sphere and really enjoy your blog. Thanks .It’s nice to hear what ya got going on.
I don’t know what I love more – your nails or your feline helper. Both are really cute :-)
Thank you :-) so happy we finally got to meet you!
5oc9ea
t1j3q2
7kyczv
glsiw3
xwl62n
degrq7
b5bvdc
z1sjxi
w7au0b
ns70rd
g1qtzo
u4zdot
8yn0gp