
When the Catalina 30 moved to the open/walk through transom design starting in 1994 with the MK III, it was necessary to have a new way of accessing the rudder post/emergency tiller fitting (which was previously accessed by way of the now nonexistent aft lazarette).
To solve this, the cockpit floor was redesigned with a removable panel covering the steering quadrant. This panel was fitted with an inspection port, allowing quick access to the emergency tiller attachment point. Unfortunately, like the rest of the deck, this panel is not solid fiberglass – instead being cored with plywood. And on our boat at least, when the cutout was made for the inspection port, it wasnot sealed *AT ALL* meaning that the wooden core was completely exposed to any/all moisture.
Basically that panel has been rotting since the minute it rolled off the factory floor.
 By the time we got the boat, the panel was so rotten/waterlogged that it actually “squished” when stepped on. Fortunately the rest of the deck was fine – the panel is a self-contained unit, so only it needed to be repaired. The plan was simple: Cut off the bottom fiberglass skin, remove all the rotten wood, add new coring, and re-glass the bottom again.
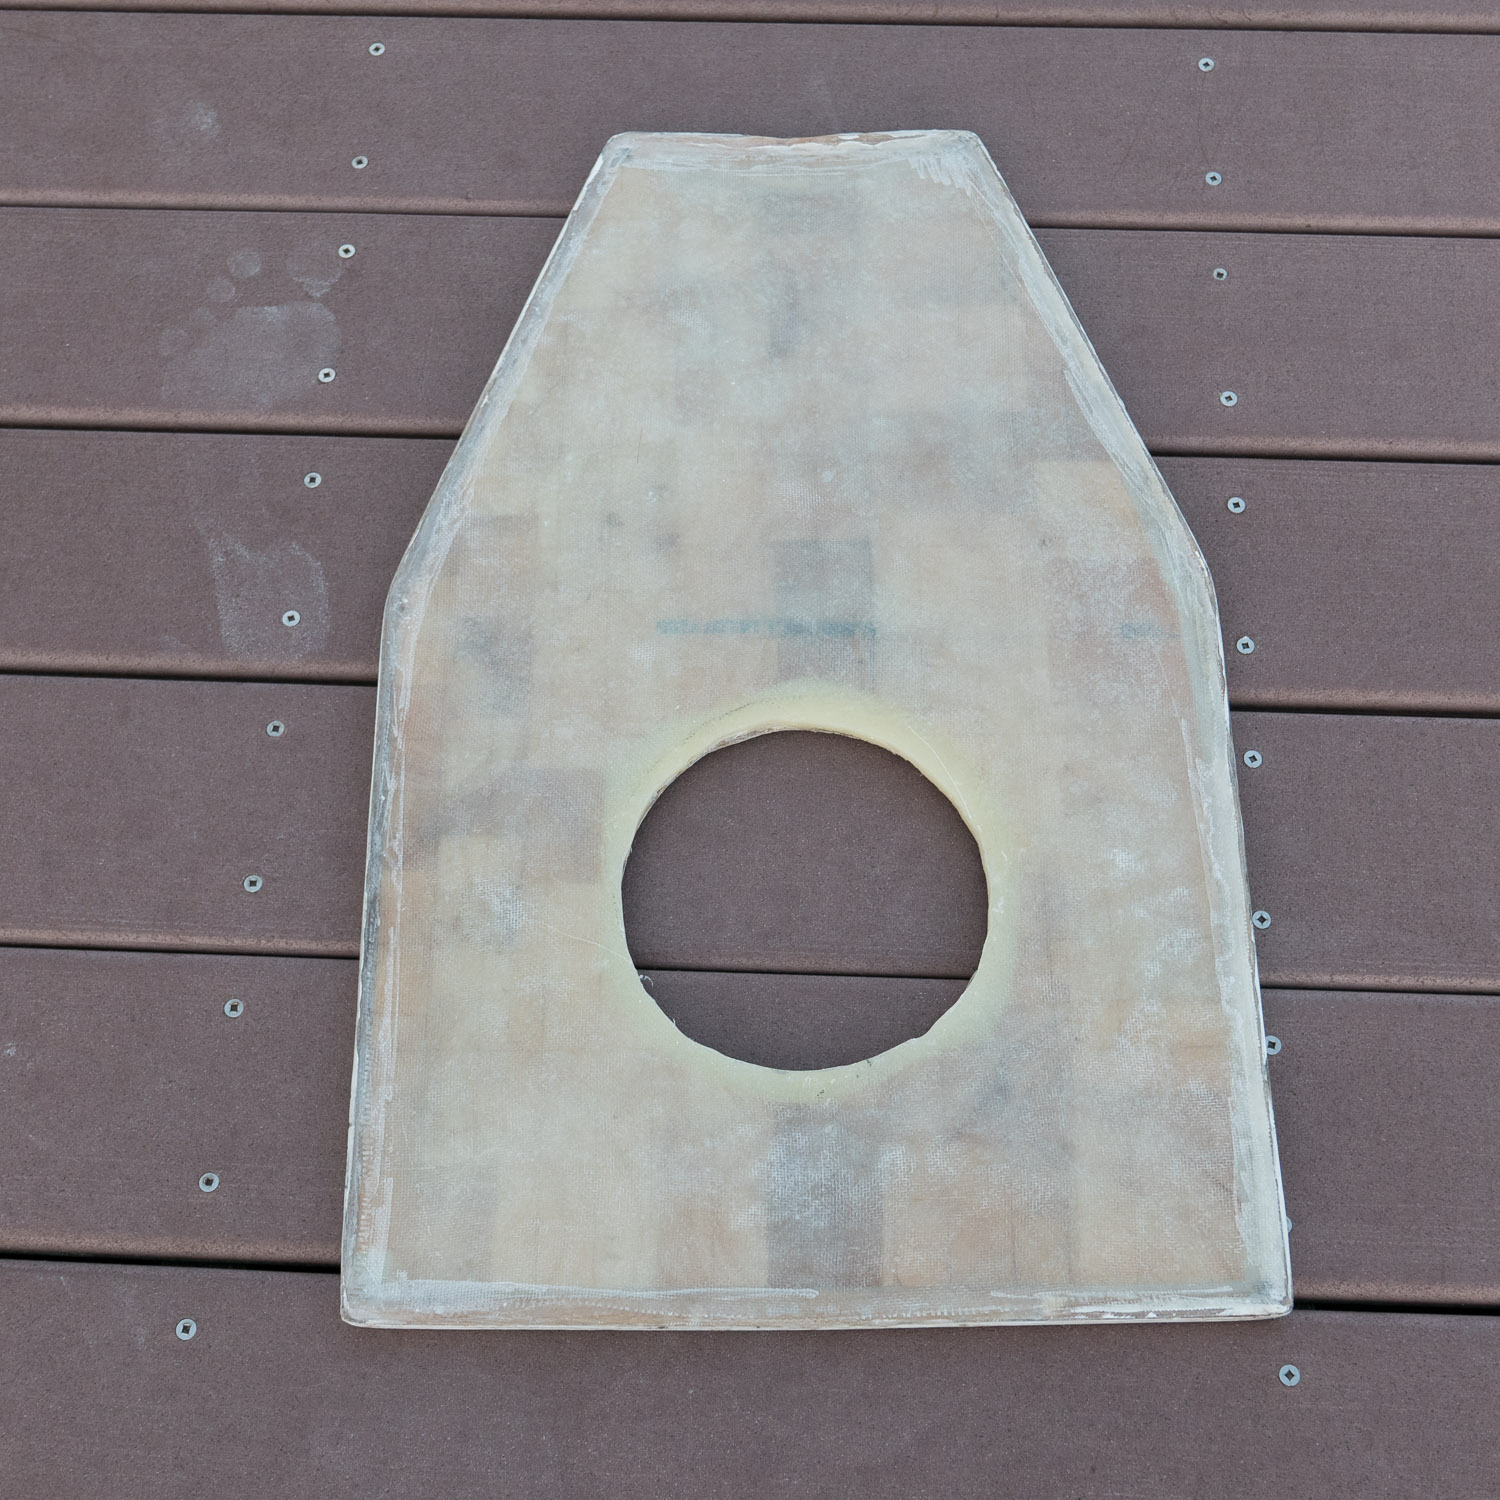
The first step was to form a plan of attack. I removed the panel to inspect it, and found that one of the edges of the bottom skin was already cracked and had begun to peel away.
Using a Dremel with a diamond cutting wheel , I made a cut along the perimeter of the bottom skin, a little ways in from the edge to preserve the walls of the panel. The wood was so rotten the skin basically had no adhesion to it, and it peeled off in a single piece without much trouble.


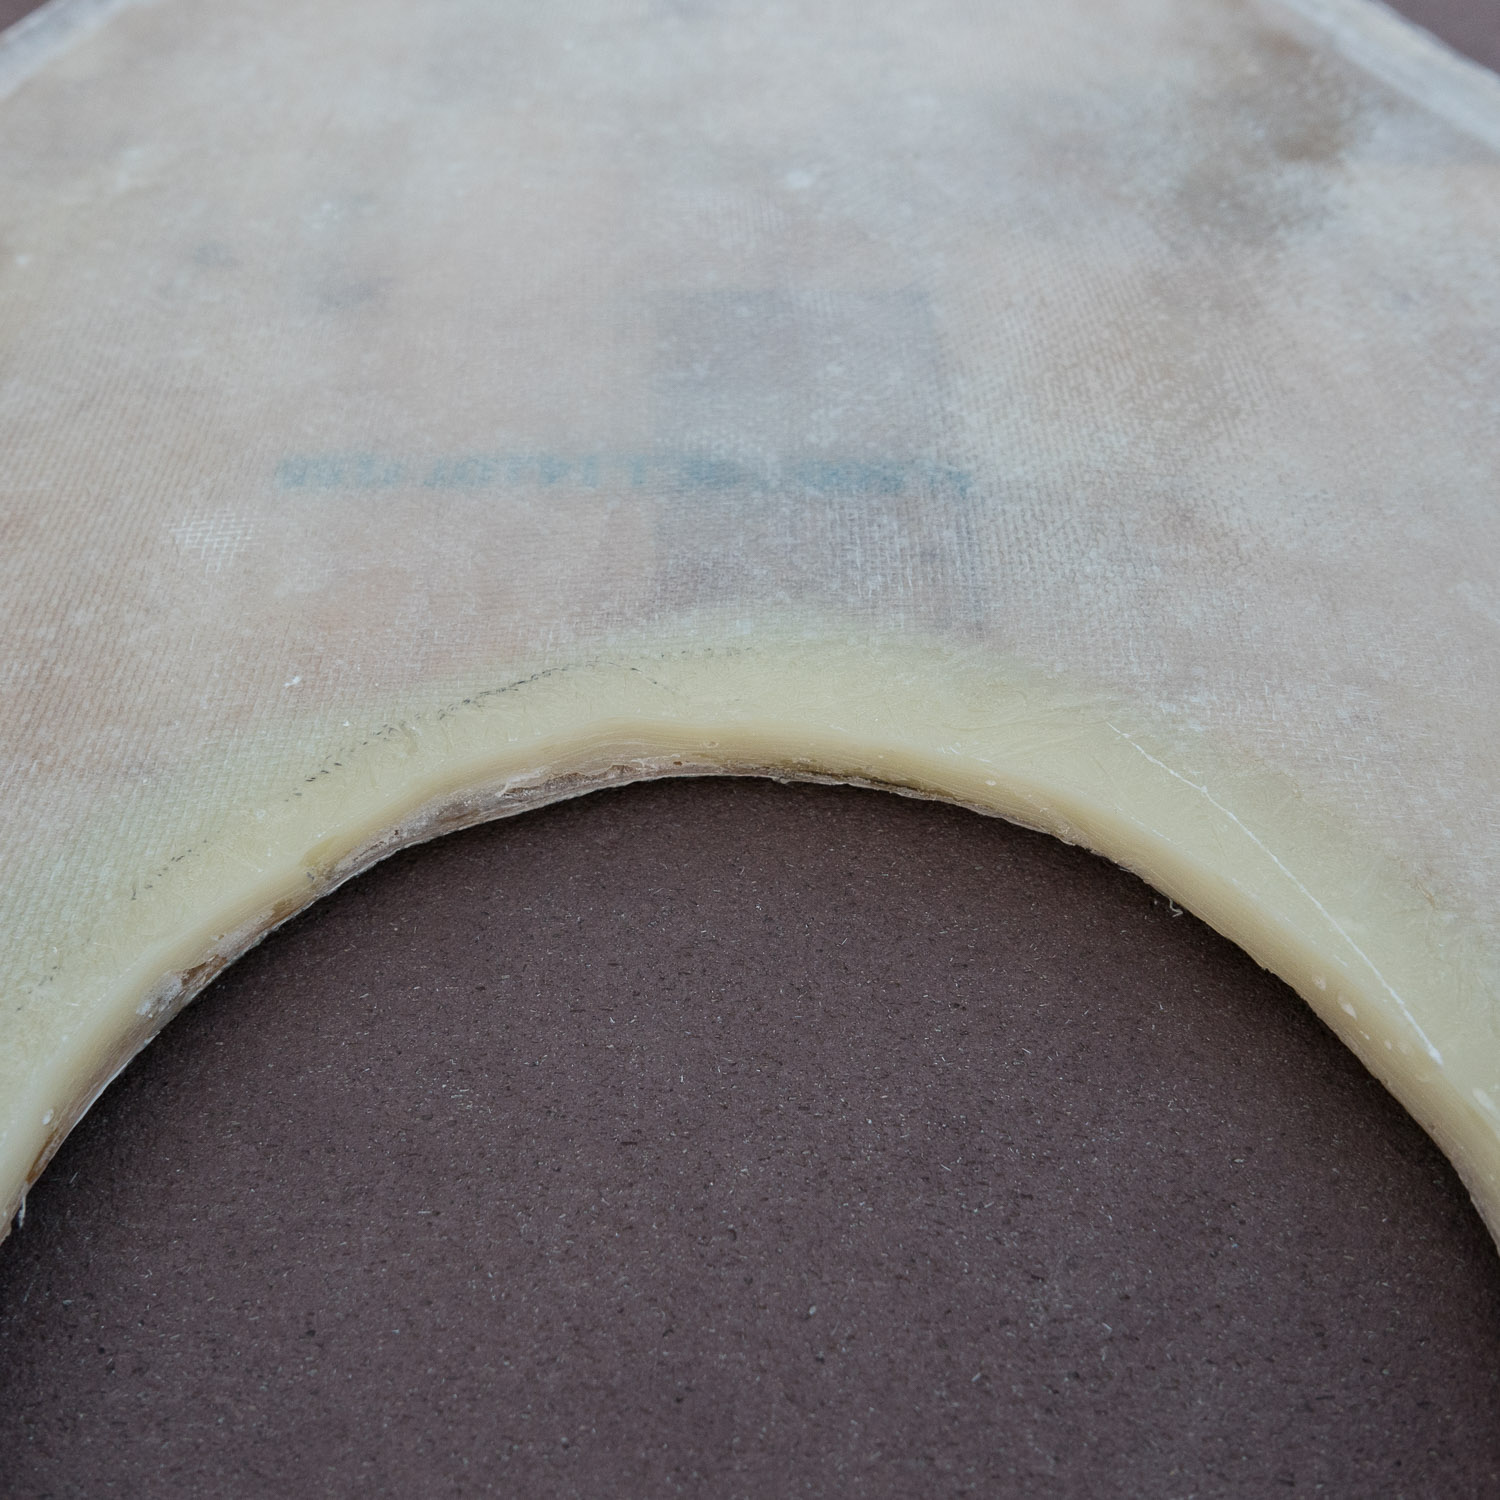
Unfortunately, getting the core itself out was a little more problematic. Some of it just crumbled and I was able to simply rip it out by hand, but much of it was still tightly adhered to the walls and upper skin. I didn’t want to simply pry/chisel since I ran the risk of damaging the upper fiberglass which I wanted to preserve, so I used my multitool with a flush-cut blade to slice the core into small chunks, and then slipped the blade under each one, cutting it away from the skin (As a side note, the tool is the Rigid JobMax interchangeable head multitool, which is probably the most useful powertool on the boat – it is a vibrating multitool, detail sander, drill/driver, jig-saw and sawzall all in one! I can’t say enough good things about it). It worked perfectly – the depth markings on the bladed allowed me to cut through the core without damaging the top fiberglass skin at all.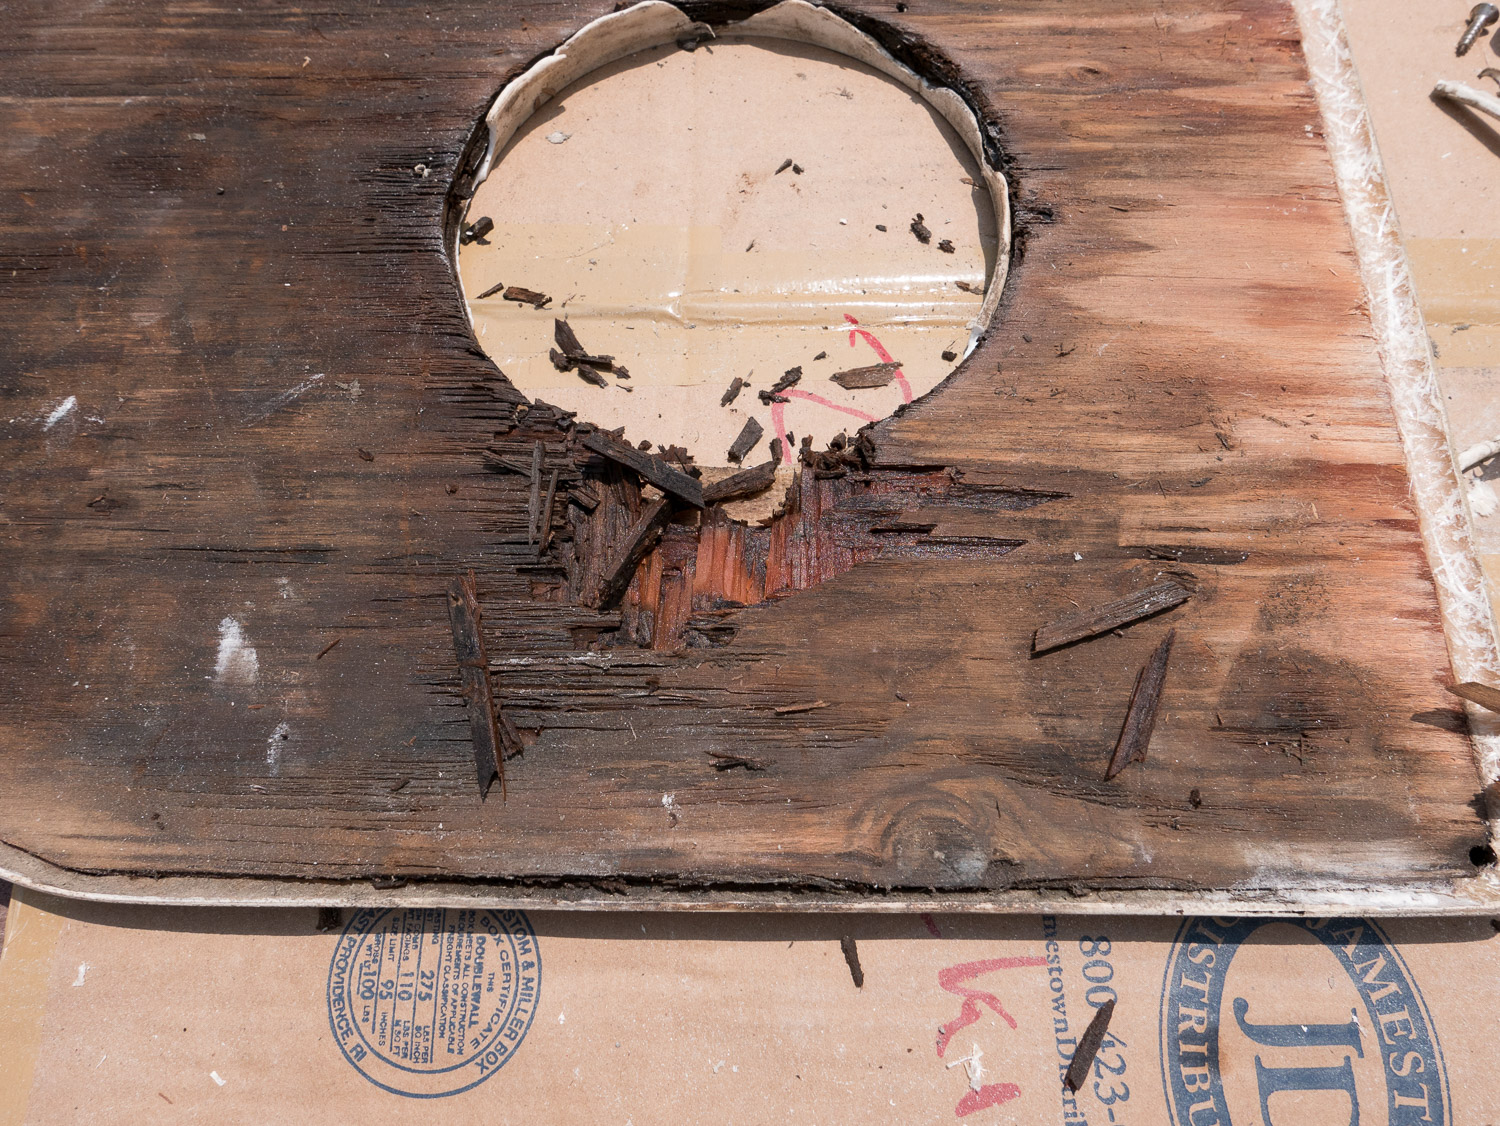
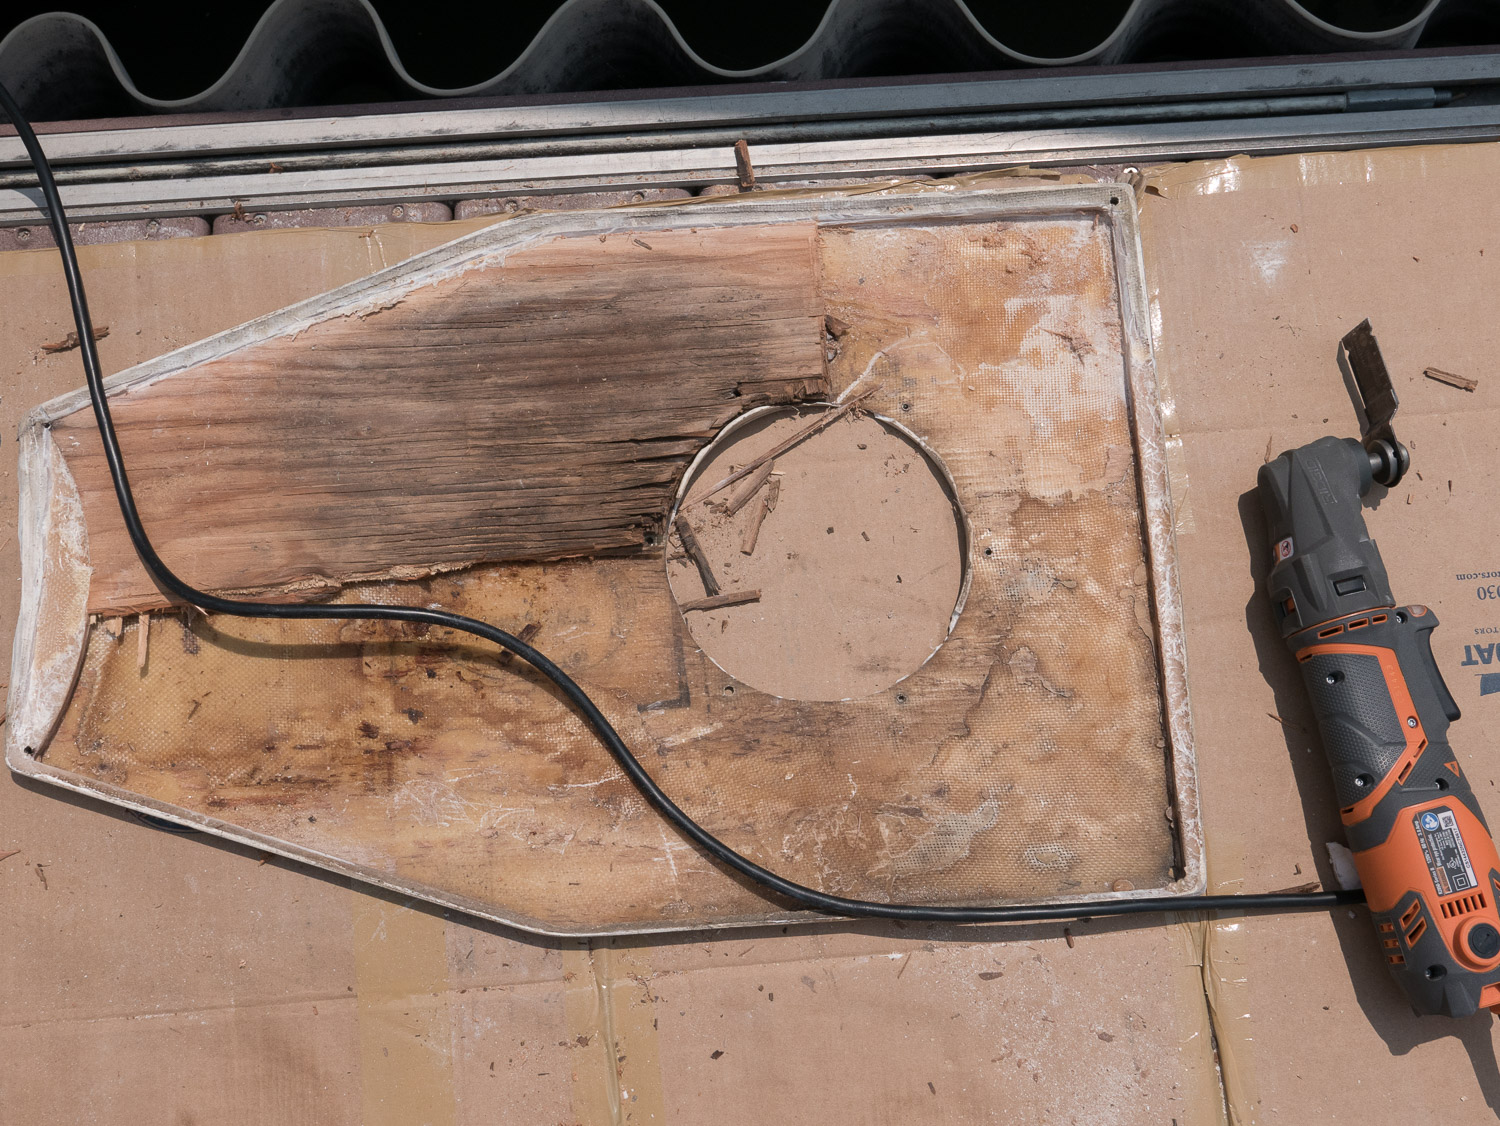

Once the core was removed, I sanded out any remaining plywood that was still stuck to the fiberglass, and gave the whole thing a wipe with acetone.
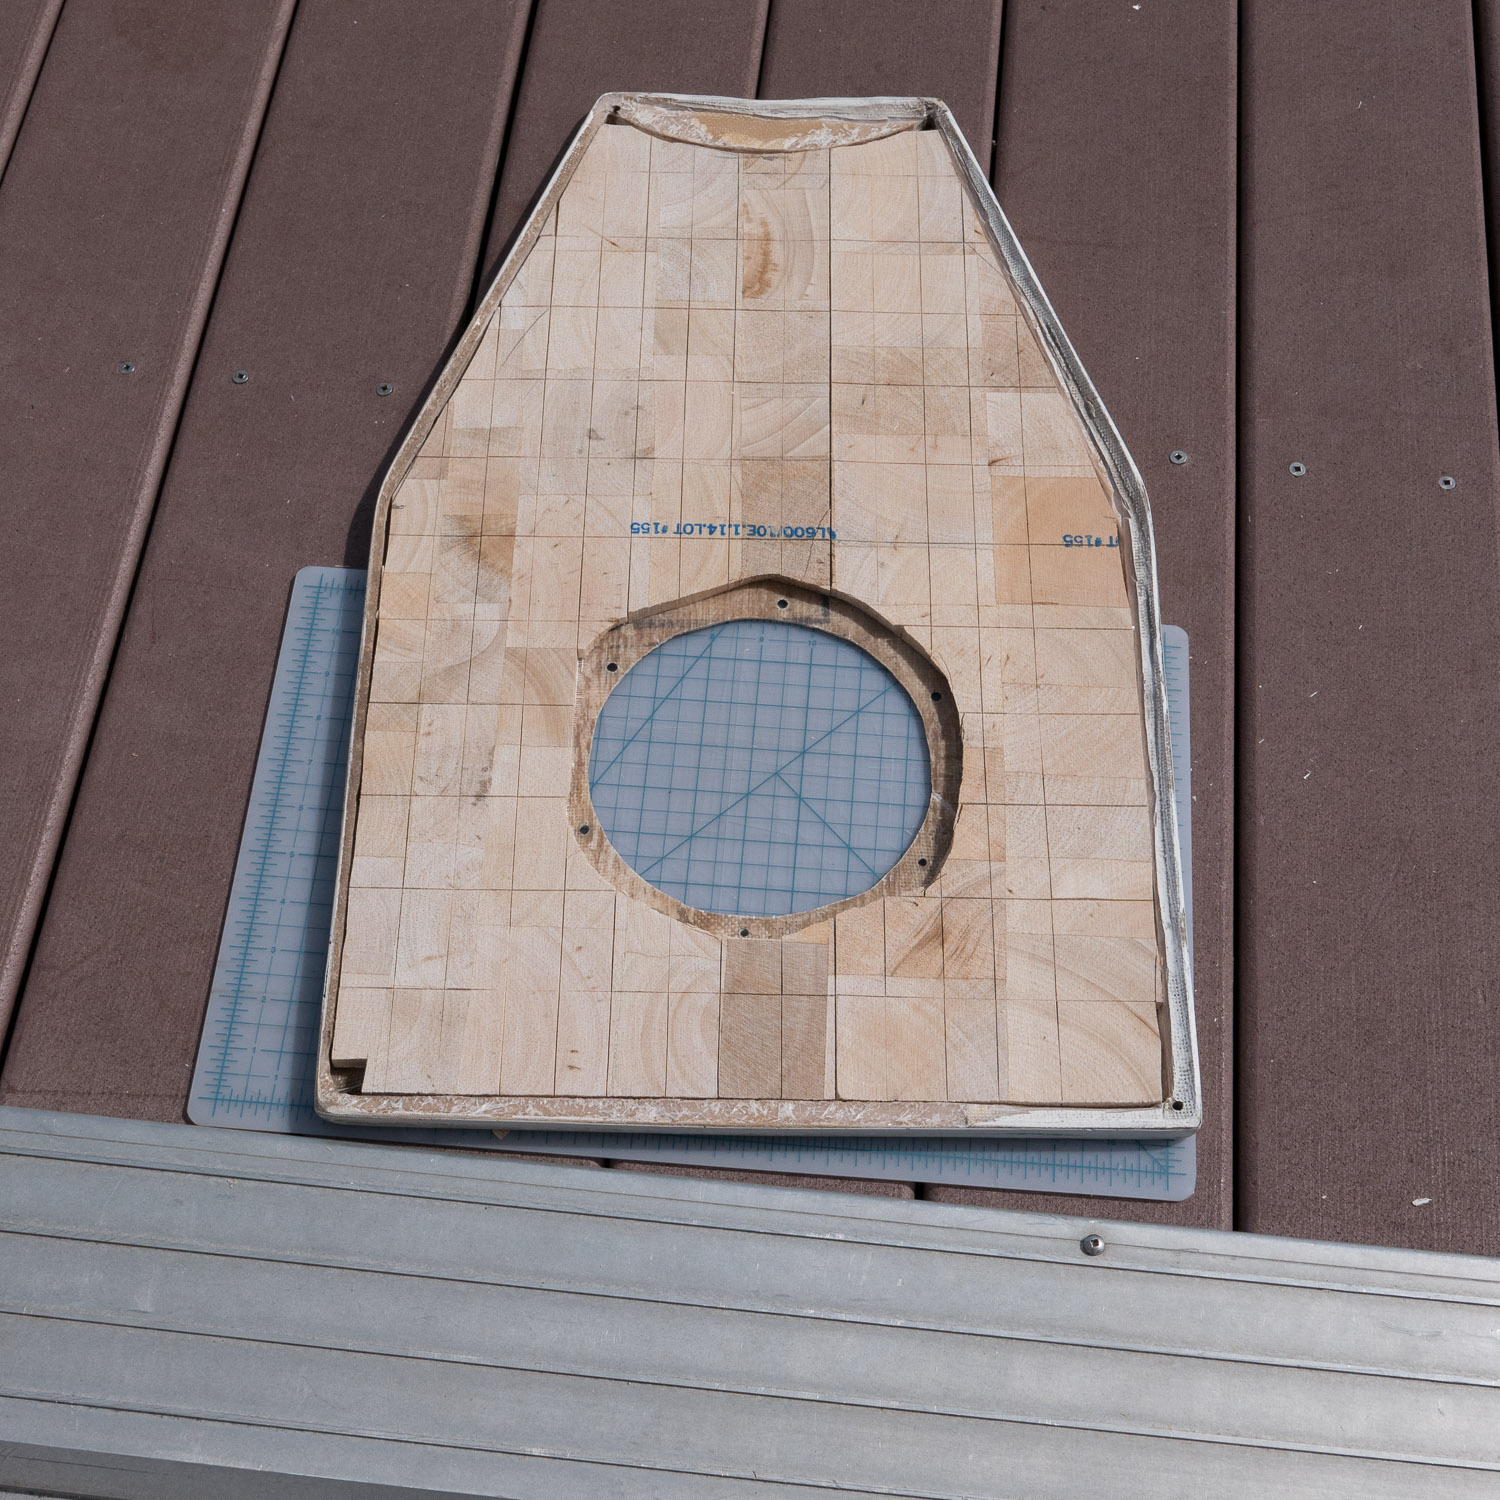
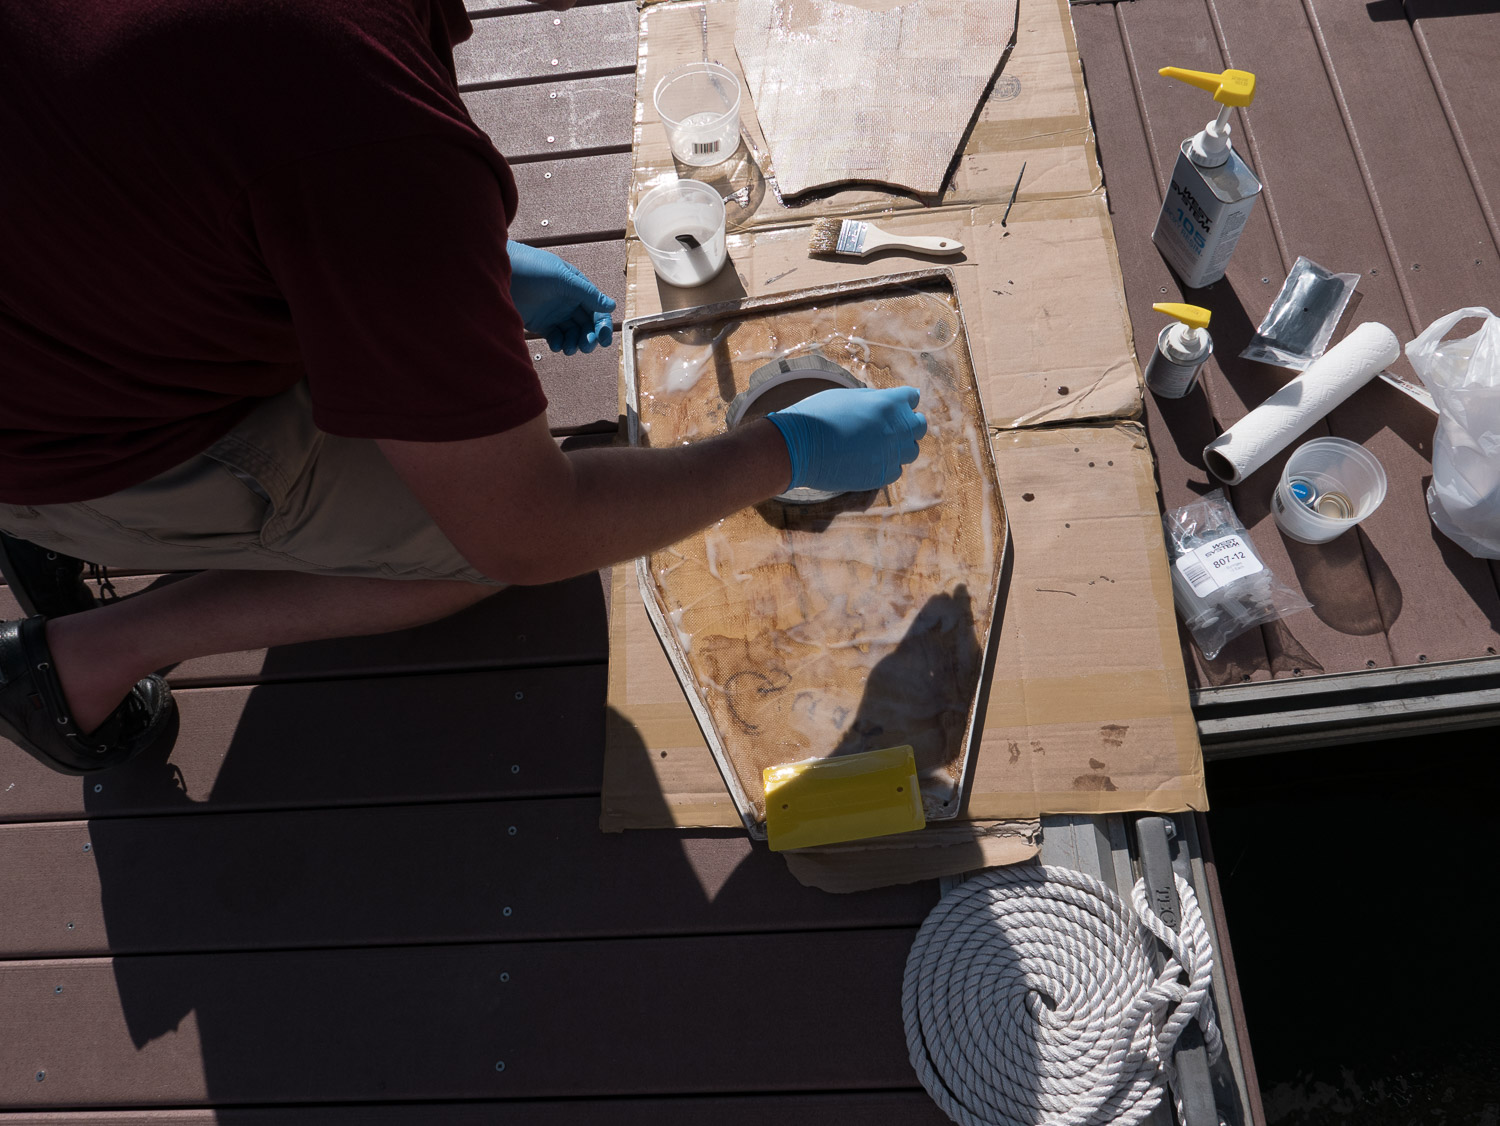
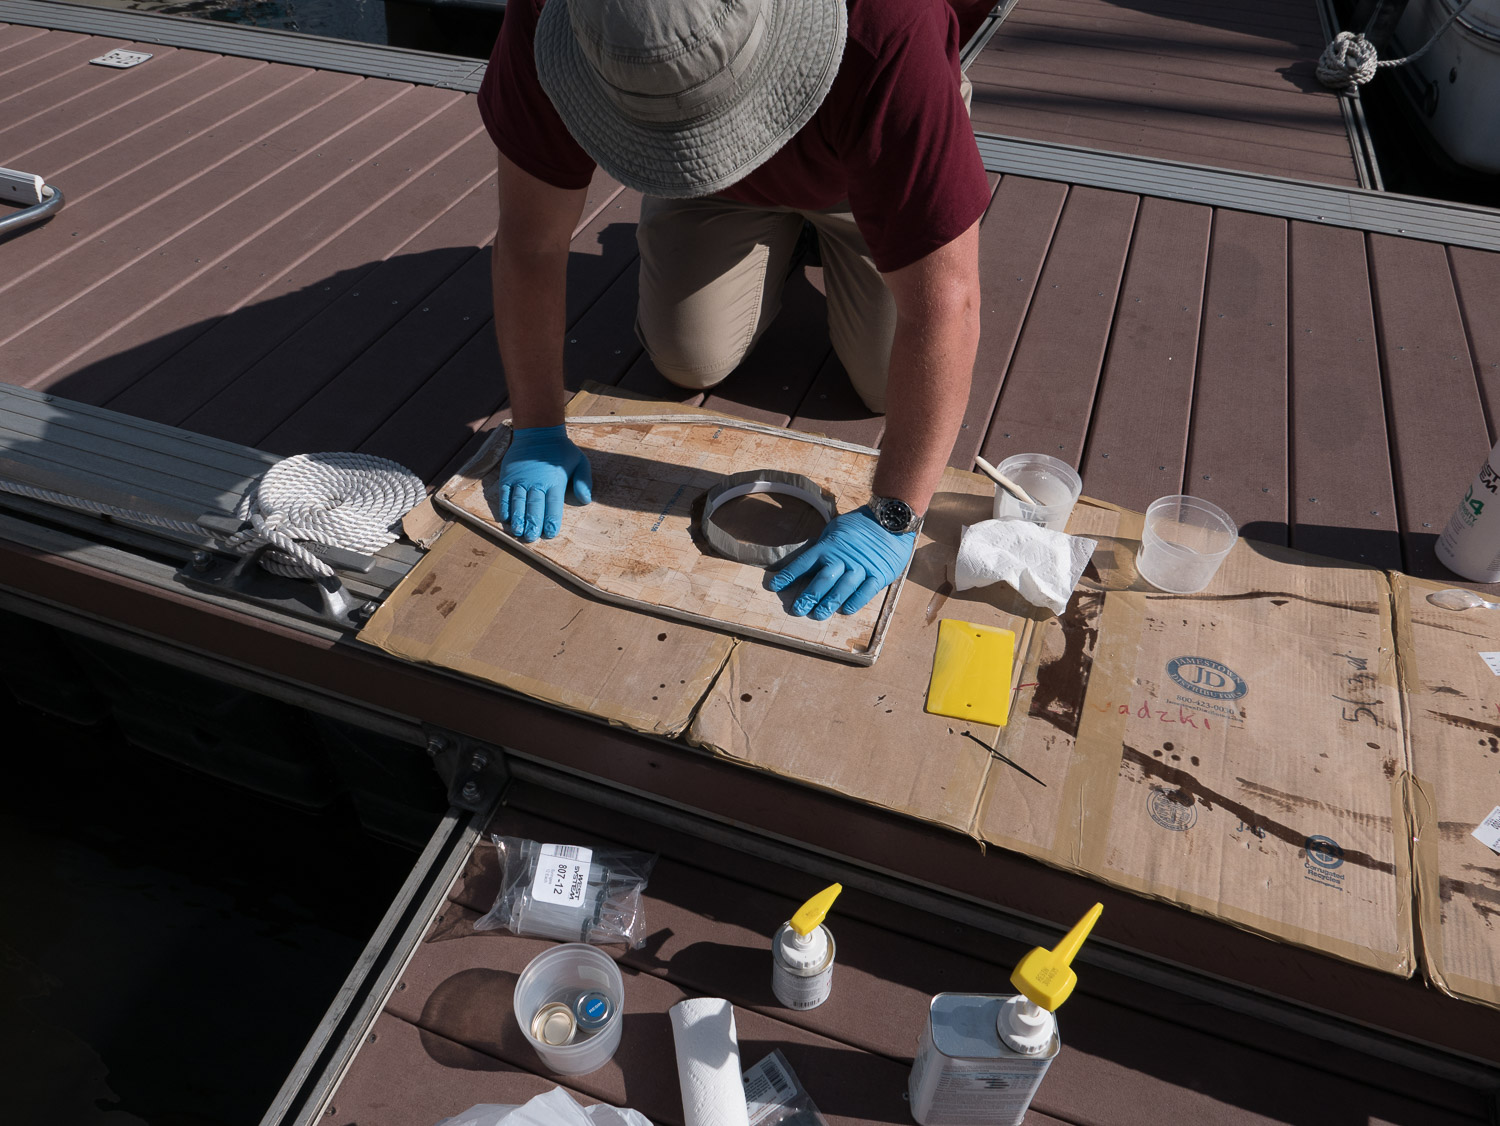
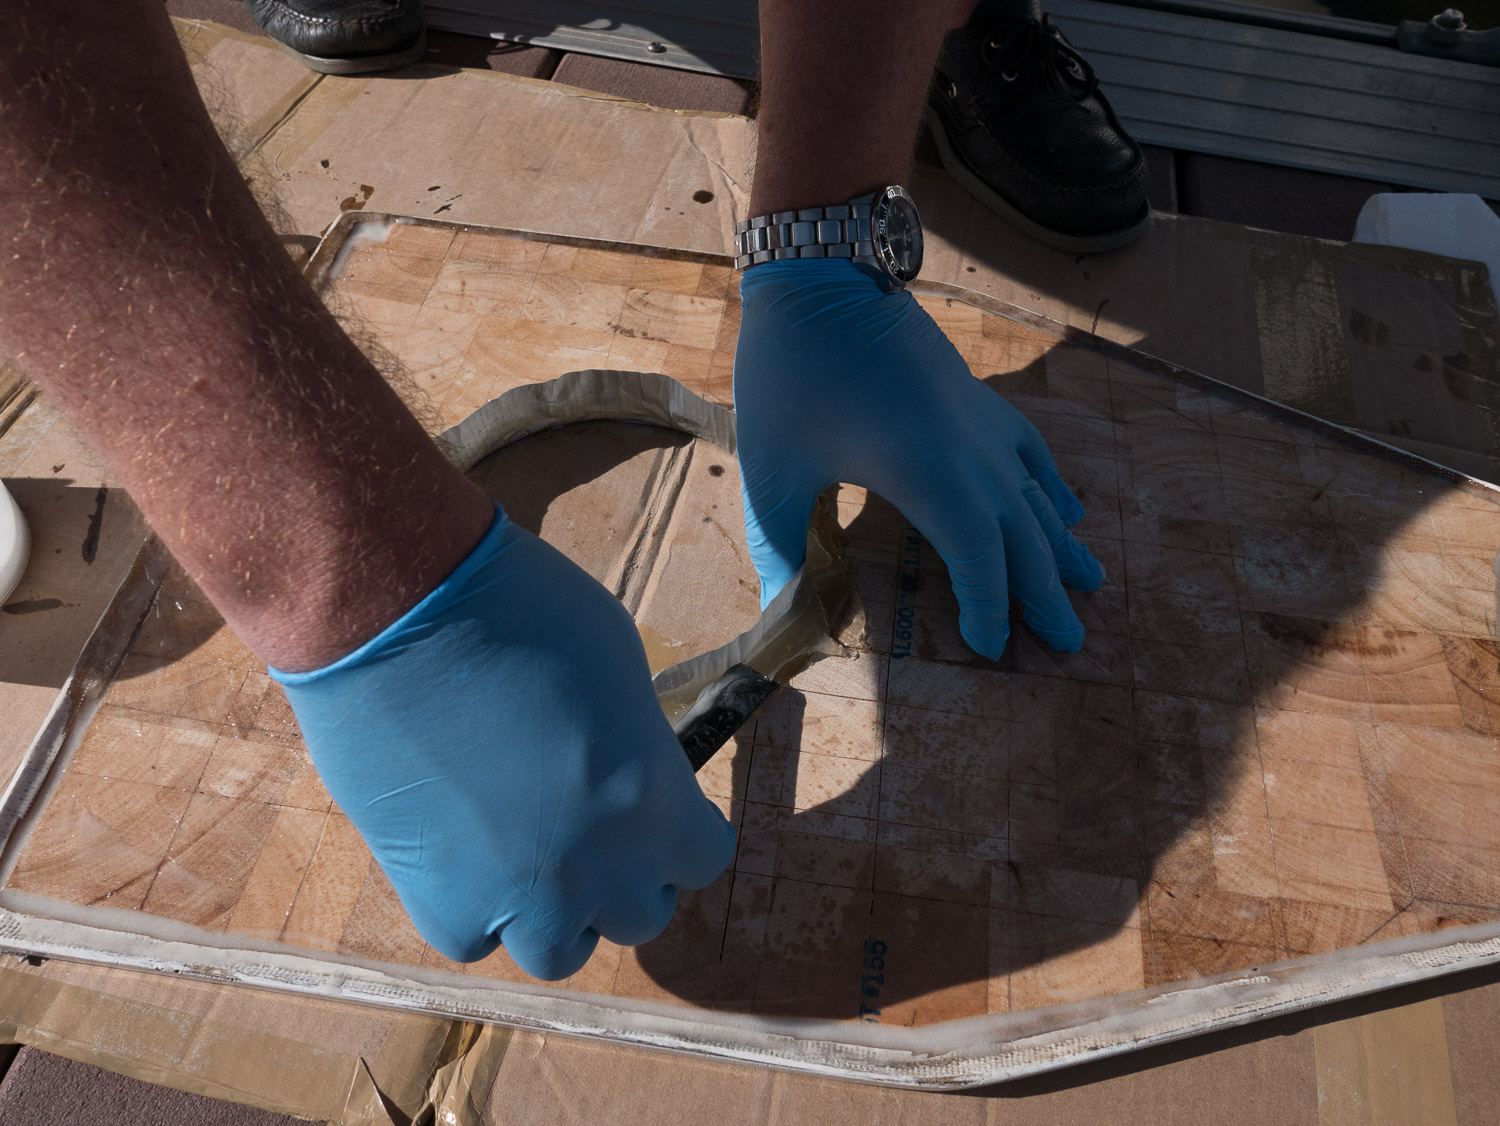
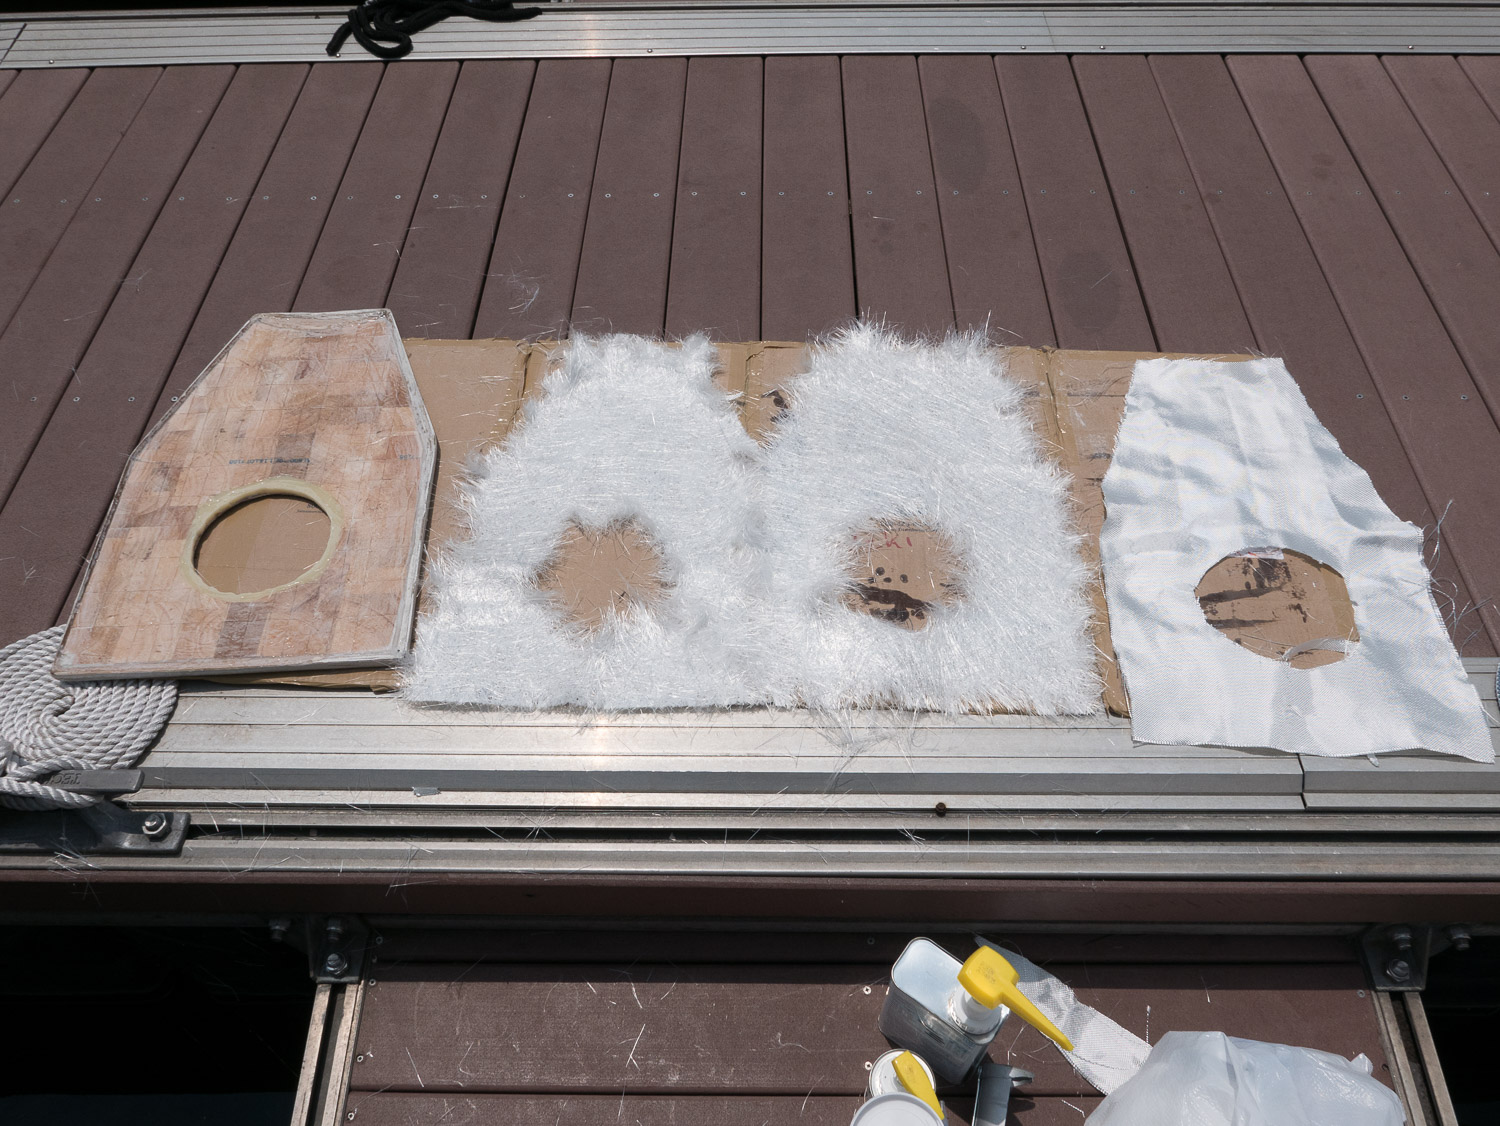
Next came fitting the new core. I used a sheet of end-grain balsa coring material. While a bit more expensive than plywood, it is far easier to work with. I simply cut it to fit with a utility knife. I also cut the inspection port hole wider than the opening in the fiberglass, in order to fill the gap with solid thickened epoxy. I also left gaps around the holes where the screws to hold down the panel went though. This way when I filled everything in with epoxy, no part of the core would ever be exposed, even if the sealant around the screws or inspection port failed. Everywhere that a hole went through the panel would now go only through epoxy, leaving no risk of water intrusion into the core (short of physical damage to the panel). I used duct tape to create a barrier, so the epoxy would not run out the big cutout/hole when it was poured into the skin.


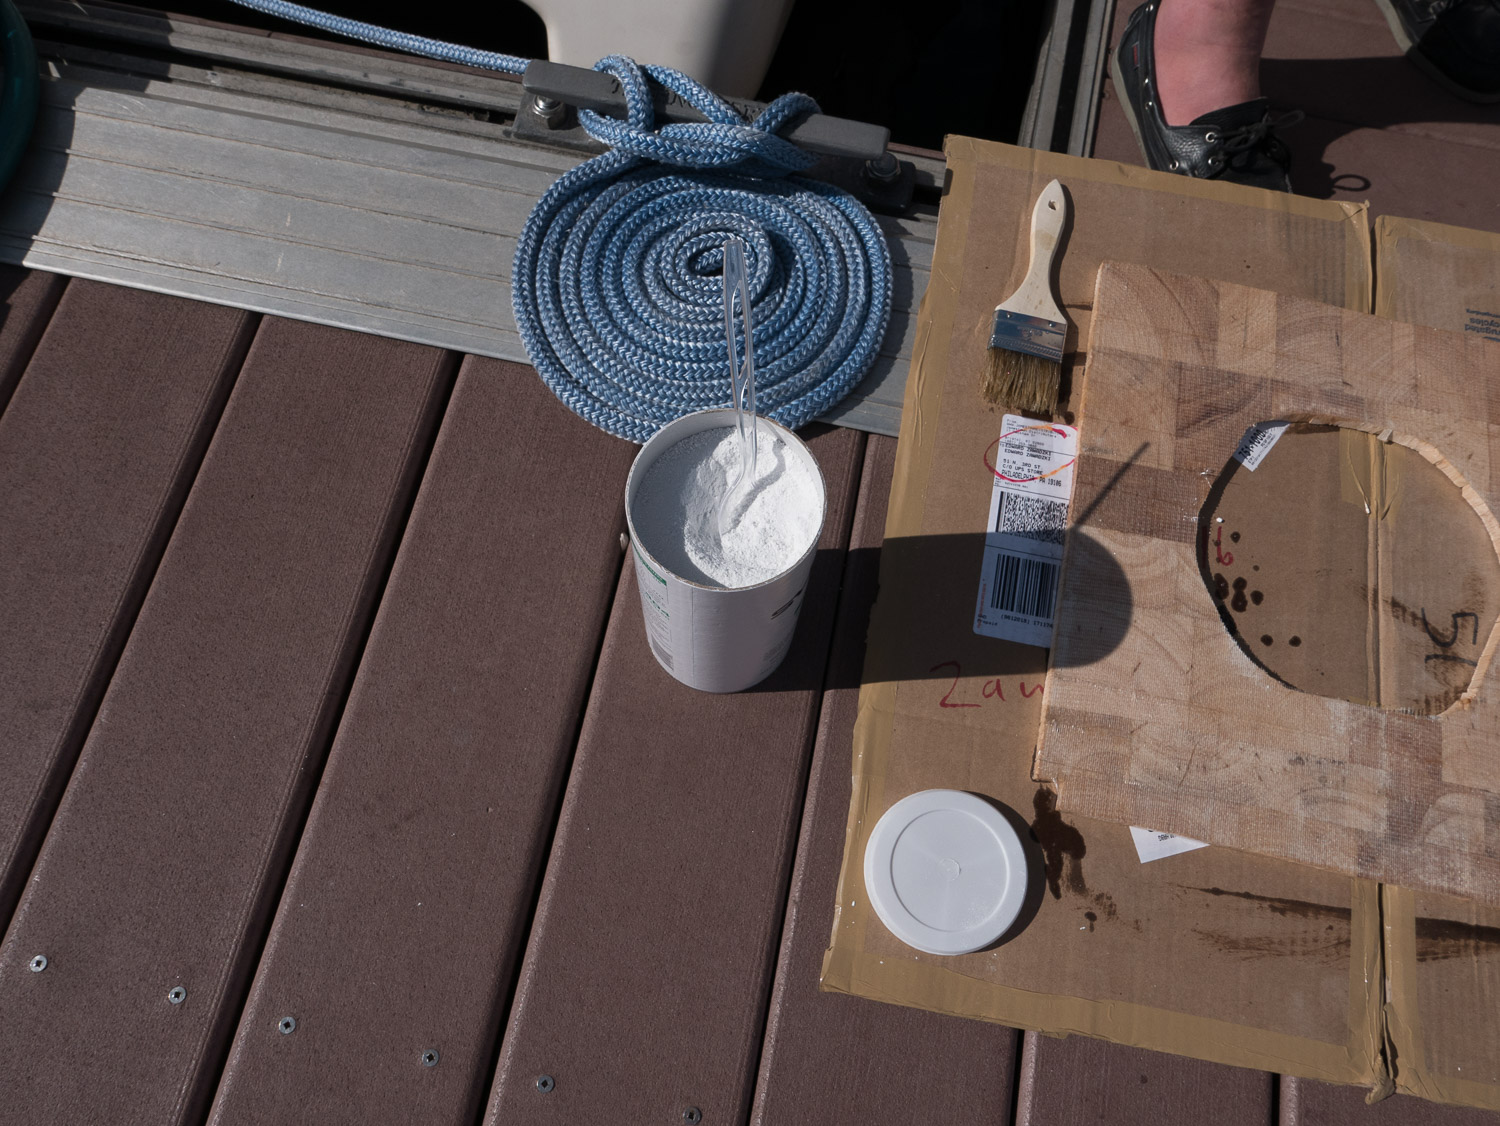
Once the core was fit I removed it, and wet out the surface of the core where it would contact the upper fiberglass skin with neat (unthickened) epoxy. This was done in order to saturate the surface so that when I bedded it in place it would not “suck up” all the epoxy used for bedding it, thus creating a “dry bond” (bad!). Once the core was saturated, I mixed up a new batch of epoxy, thickened with West Systems 404 filler to about a ketchup consistency. I poured this into the skin to fill the various small surface irregularities and provide a nice “bed” for the core to adhere to. I placed the core in, and filled in all the gaps with more of the thickened mixture. To create the epoxy “ring” around the inspection port opening, I used a tube of West Systems 610 pre-thickened epoxy. I could have just used more the 404-thickened mixture, but the caulking-gun style tube with nozzle was just easier to use for getting the epoxy into the channel around the core. Once all the gaps were filled, I cleaned off any excess epoxy and waited for it to cure.


Once everything was cured, I began on the new bottom skin. I used 2 layers of chopped-strand matt, and one layer of woven fiberglass. Each layer was wet-out with unthickened epoxy, using a disposable bristle brush and squeegee. After all 3 layers were on, I waited till the epoxy began to set, then trimmed the excess fiber around the edges & opening. Once fully cured, I sanded all the sharp edges smooth. Since this was the underside of the panel I didn’t need to worry about painting or fairing, so once everything was cured, we were good to go.


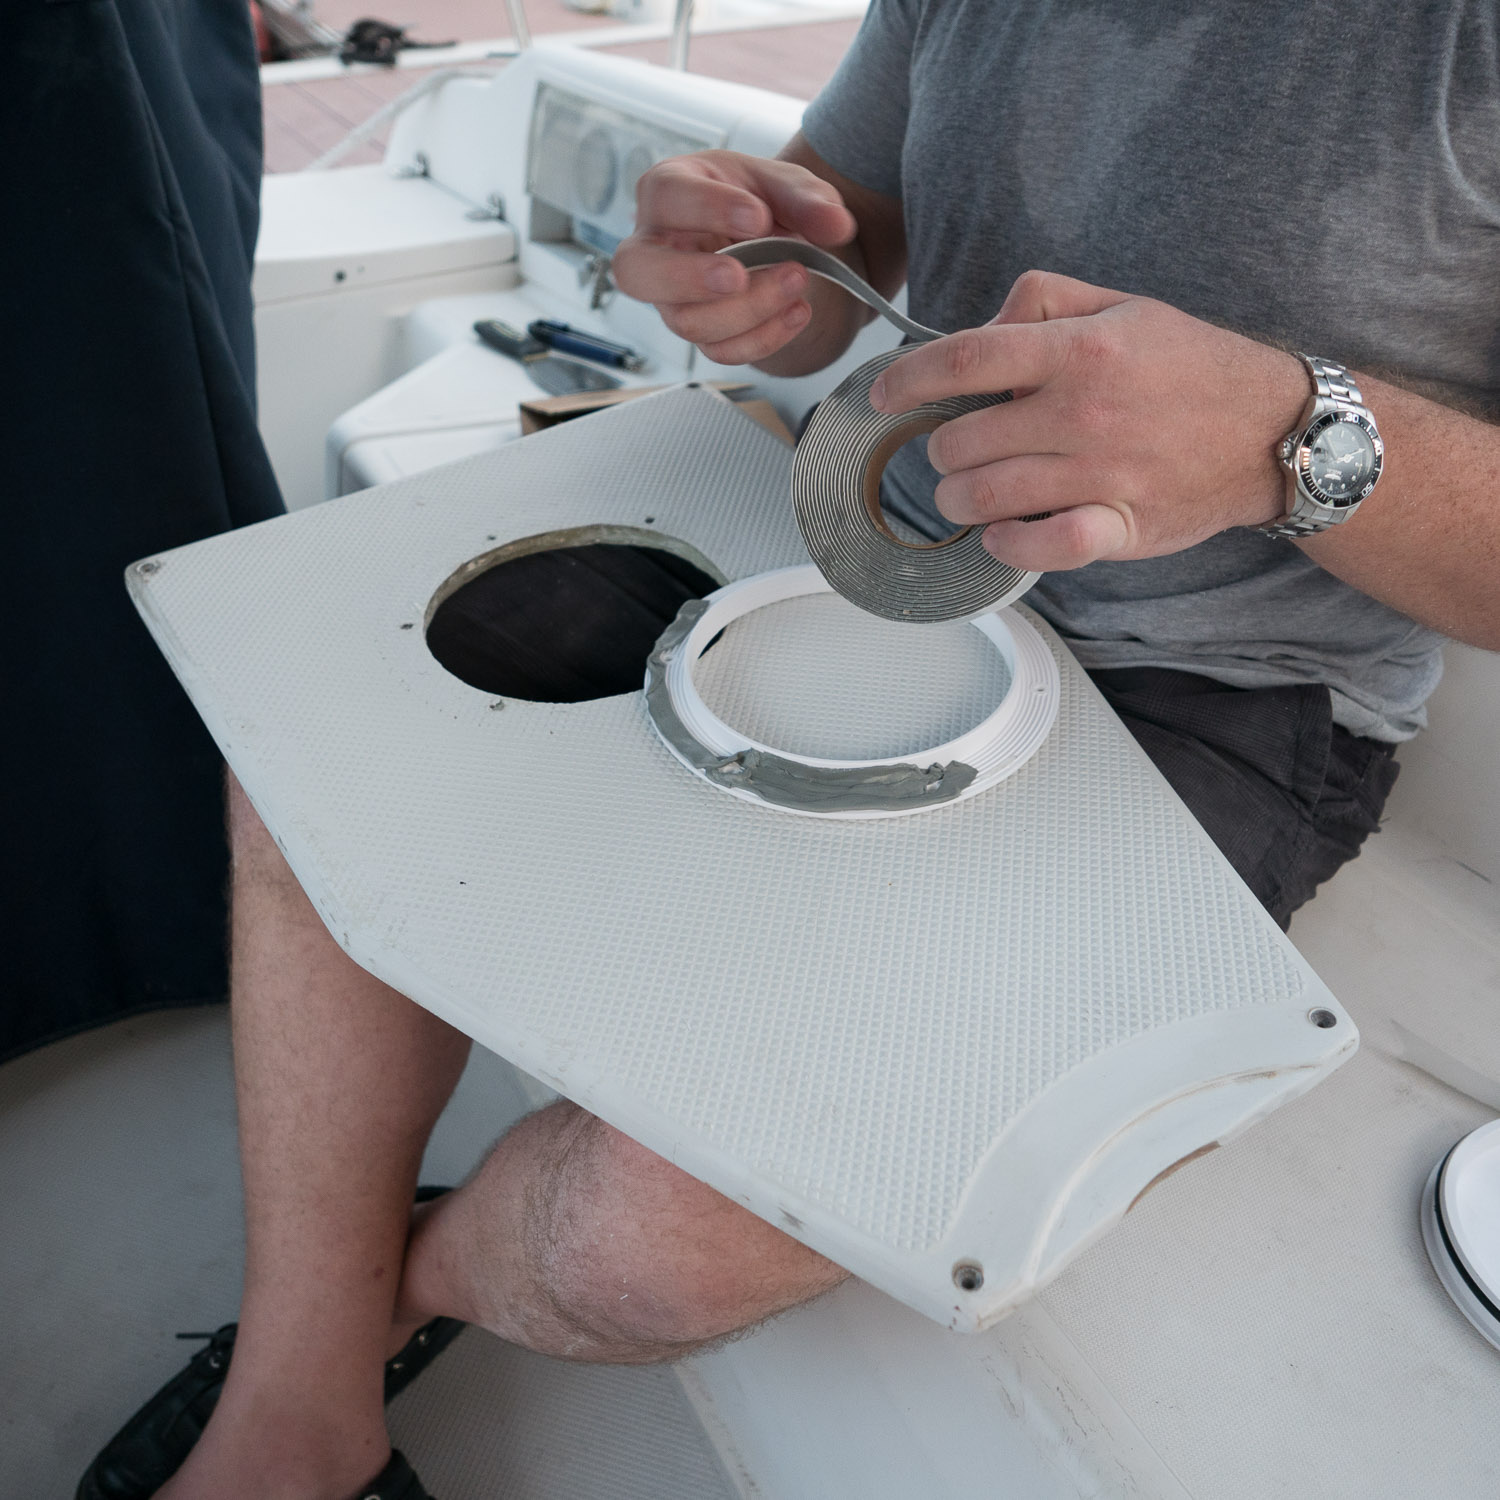


Once the epoxy had fully hardened, I installed the new inspection port. I drilled pilot holes using the old holes as a guide. The holes now go directly into the ring of epoxy so there is no risk of water intrusion into the core from the screw holes. I used marine-grade butyl (the same stuff I used for bedding the stanchions) to seal the inspection port. In hindsight, it was a bit too thick for the purpose and if I were to do it again I’d use something like LifeSeal or the like, however it worked fine. Once the inspection port was in place it was simply a matter of screwing the panel back in. Since my layup was a bit thicker than the original, I needed slightly longer screws (1.25″ vs 1″) but the difference is not noticeable without careful inspection. Now I can rest easy knowing that the steering quadrant panel is in better-than-factory shape, and should not need to ever be addressed again!

Good job I have the same issue with my catalina 30. Do you believe git tot would work